
Last Updated on December 6, 2022
Many people are curious if they can tile over their plastic shower walls. Adding tiles to a shower wall made of plastic can seem intimidating, but it can be done with the right tools and instructions.
A plastic shower wall is a great way to save money on your bathroom renovation. It’s also an easy way to update the look of your bathroom, doing no major construction. But there are some things you need to know before you tile over your plastic shower wall.
We’ve got you covered. Here’s how you can you tile over plastic shower wall with ease.
What is a Plastic Shower Wall, and Why Would you Tile over it?
Plastic shower walls are a type of wall paneling that is often used in bathrooms. It is made from a durable, waterproof material that is easy to clean and maintain. Plastic shower walls are available in a variety of colors and styles, and they can be installed quickly and easily.
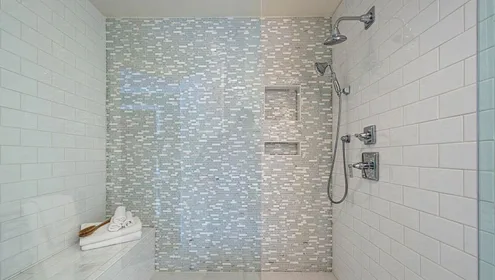
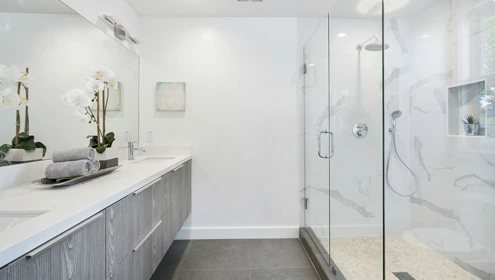
One reason for tiling over a plastic shower wall is to improve the look of the bathroom. Tiles come in a wide range of colors, patterns, and textures, so it is easy to find an option that complements the existing décor. Tiling can also be used to create a unique design or accentuate certain features of the bathroom.
The tiled wall will also protect the plastic wall from damage if it is overlaid with ceramic tile. Water and soap can cause discoloration and deterioration over time, but tiles create a barrier that helps to prevent this type of damage.
Tiling also makes it easier to clean the walls, as dirt and grime can be quickly wiped away. Finally, tiling can help to insulate the bathroom against sound and heat, making it more comfortable to use.
Can You Tile Over Plastic Shower Wall: The Best Method
Tiling over plastic shower walls can be tricky, but it can add a nice touch of style to your bathroom if done correctly. If you’re looking for a durable and easy-to-clean shower surround, tile over a plastic shower wall is a great option. Here’s a step-by-step guide on how to do it:
1. Installing the Shower Base
Before you can tile over a plastic shower wall, you first need to install a new shower base. Begin by marking the location of the drain hole on the shower base. Then, use a hole saw to cut out the drain hole. Next, apply a bead of silicone caulk around the drain hole.
Carefully place the shower base in the shower stall and press it into place. Once the base is in position, use a level to make sure it is level.
If necessary, adjust the base until it is level. Finally, apply a bead of silicone caulk around the outside of the base to seal it in place. Once the caulk has dried, you are ready to begin tiling.
2. Applying the Tile Adhesive
Applying tile adhesive before tiling over plastic shower walls is a great way to ensure a secure and lasting bond. The key is to use an adhesive that is specifically designed for bonding to plastic surfaces.
Not all adhesives are created equal, and using the wrong one can result in tiles that eventually fall off or fail to adhere properly. When choosing an adhesive, be sure to read the label carefully and select one that explicitly states that it is suitable for use on plastic.
Once you have the right adhesive, the application process is fairly straightforward. Begin by cleaning the plastic surface with a mild cleanser and allowing it to dry completely. Then, apply the adhesive according to the manufacturer’s instructions.
If the adhesive has had sufficient time to set, you may begin tiling over the shower wall. You can create a beautifully tiled surface that will last for years to come with a little care and attention.
3. Laying the Tiles
After the adhesive has been applied, it’s time to start laying the tiles. The first step is to lay out the tiles in the desired pattern on the floor of the shower. This will help you determine how many tiles you need to cut and how they will fit around the shower fixtures.
Once the tiles are laid out, use a level to ensure they are even. If they are not, use a tile saw or nippers to trim them so they are level.
Next, apply mortar to the back of each tile with a notched trowel. Spread the mortar evenly over the entire back of the tile.
Be sure to work quickly so that the mortar does not dry before you apply it to the wall. After the mortar is thoroughly applied, begin setting the tiles onto the wall. Begin at the bottom and work your way up. Make sure the tiles are evenly spaced.
When you reach the top row of tiles, cut them to size with a wet saw or tile nippers and set them into place. Finally, wipe away any excess mortar from the tiles and allow them to dry for 24 hours before grouting.
4. Applying the Grout
It is also important to use grout over a plastic shower wall. First, you will need to determine the type of grout that is best suited for your project. Then you will need to mix the grout accor’s instructions.
Once the grout is mixed, you will need to apply it to the tiles using a grout float. Be sure to work the grout into all the joints and spaces between the tiles. Once you have finished applying the grout, you will need to remove any excess material from the surface of the tiles.
Finally, you will need to allow the grout to cure for the amount of time specified by the manufacturer.
5. Caulking the Seams
After you’ve applied the grout, it’s important to caulk the seams in order to create a waterproof seal. Start by running a bead of caulk along the outside edge of the shower, where the wall meets the tile.
Then, use your finger or putty knife to smooth it into place. In the corners of the shower, where two walls meet, place a bead of caulk. Once again, smooth it into place with your finger or a putty knife.
Finally, apply caulk to any other seams or cracks in the shower. Once you’re finished, wait 24 hours for the caulk to dry before using the shower.
How to Choose the Right Tiles for Your Project?
Picking out the appropriate tiles for your project is an important decision. There are many factors to consider, including color, material, size, and shape. With so many options available, it can be overwhelming to choose the perfect tile.
However, by taking the time to do your research, you can find the perfect tile for your needs.
First, decide what type of tile you need. There are many different materials to choose from, including ceramic, porcelain, glass, and stone. Each material has its own unique benefits and drawbacks.
Ceramic tiles, for example, are durable and easy to clean, but they are also prone to cracking and chipping. Similarly, porcelain tiles are easy to clean and durable, but they are more expensive than ceramic tiles. The beauty of glass tiles is also their fragility. However, stone tiles can be hard to install, despite their strength and natural appearance.
Once you have decided on a material, you can narrow down your choices by considering color and pattern. Do you want a solid color or a pattern? Bright or muted? Traditional or modern?
There are endless possibilities when it comes to tile colors and patterns. If you’re unsure of what you want, take some time to browse through tile samples until you find a style you love.
When you have a general idea of the type of tile you want, it’s time to consider the size. Tiles come in various sizes, from small mosaic tiles to large format tiles. The size of the tile will depend on the area you’re tiling and your personal preferences.
Mosaic tiles are perfect for backsplashes and small accent areas. Large-format tiles are ideal for flooring and walls. If you’re not sure what size tile you need, ask a sales associate for help.
Think about the tile’s shape as well. Tiles come in square, rectangular, and hexagonal shapes. They can also be found in a variety of unique shapes, such as penny rounds and subway tiles.
The shape of the tile will also vary based on the area you are tiling. For instance, square and rectangular tiles are best for floors, while mosaic tiles are better suited for backsplashes and accent walls.
So now you know how to choose the right tile, it’s time to start shopping. Visit your local tile store or browse online retailers to find the right tile’s for your home.
Mistakes to Avoid When Tiling Over Plastic Shower Walls
When it comes to installing tiles over plastic shower walls, there are a few potential mistakes that you will want to avoid.
Properly Prepared Surface:
One mistake that can easily be made is not preparing the surface properly. The last thing you want is for your tiles to come loose and fall off because the plastic shower wall wasn’t prepped right. Make sure to clean the surface and then use a primer before applying tile adhesive.
Applying Too Much Pressure:
Another potential mistake is applying too much pressure when attaching the tiles to the wall. This can cause the tile to crack or break. Be sure to apply just enough pressure to get a good seal without putting too much strain on the tile.
Not Sealing the Tiles:
If you don’t seal the tiles after they’re installed, then water can seep behind them and lead to mold or mildew. This can ruin the tiles and lead to expensive repairs. After the tiles have been installed, seal them to prevent this from happening.
Avoid Using too much Adhesive:
When you’re tiling over plastic shower walls, don’t use too much adhesive. Otherwise, your tiles will slip or fall off the wall. Use just enough adhesive to get a good seal without making a mess.
Ensure that the Tiles are Evenly Spaced:
If the tiles are spaced too far apart, there could be gaps that allow water to seep through. This can cause mold or mildew to form. Make sure to space the tiles evenly so that there are no gaps.
By following these tips, you can avoid making common mistakes during the tiling process. By taking your time and doing it right, you can create a beautiful and durable tile installation that will last for years.
Final Thought
Trying to tile over a plastic shower wall can be a challenge, but it’s definitely doable with the right preparation. Be sure to clean the surface, use a primer, and apply tile adhesive carefully to avoid common mistakes. With a little bit of patience, you can install tiles that will last for many years. If you have any questions or need help with your project, be sure to ask a sales associate at your local tile store. They will be able to give you expert advice and guidance. Good luck.
You Might Want to Check:
- What to do if your Swanstone shower floor is filthy?
- Is it possible to paint Travertine Tile in the shower?