Last Updated on July 10, 2023
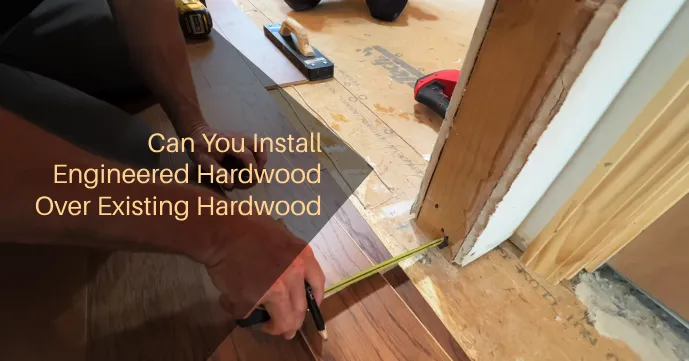
You may wonder if you can install engineered hardwood over existing hardwood when upgrading your home’s flooring.
It’s possible to install engineered hardwood over existing hardwood. But the existing hardwood should be in good condition with no major cracks or unevenness. If the old flooring is damaged, it may need to be removed before installing the new flooring.
When installing engineered hardwood over existing hardwood, use a floating floor method with a plywood or OSB subfloor. This method allows for some flexibility and avoids problems with differential expansion.
Before installing the new flooring, ensure the subfloor is level and debris-free. Let’s look at the process of installing engineered hardwood over existing hardwood in detail.
How to Install Engineered Hardwood Over Existing Hardwood Floor?

It’s easy to install engineered hardwood over existing hardwood by following these steps:
Step #1: Evaluate the Condition
Step #2: Prepare the Subfloor
Step #3: Remove Baseboards and Trim
Step #4: Install an Underlayment
Step #5: Begin Installation
Step #6: Complete the Installation
Let’s take a closer look at the steps.
Step #1: Evaluate the Condition
Take a good look at your existing hardwood floor to ensure it’s in tip-top shape before considering adding engineered hardwood. Here are the things you need to check:
- Check for major cracks or damage: Any significant damage will need to be repaired before installing the new floor.
- Check for unevenness: Any unevenness in the existing floor can cause problems for the new floor, so it’s essential to address any issues before installation.
- Check for stability: Ensure that the existing floor is firmly attached to the subfloor, as any movement or instability can lead to creaking or other problems down the line.
Once you’ve evaluated the condition of your existing hardwood floor, you can determine whether it’s suitable for installing engineered hardwood over it.
Step #2: Prepare the Subfloor
You need to secure any loose areas on the subfloor before installing the engineered hardwood flooring. Use nails or screws to keep the floor from moving, which could damage it.
Check the subfloor for any loose boards or squeaks and fix those as well. A secure subfloor will ensure the longevity of the new flooring.
After securing the subfloor, the next step is to level out any humps or depressions. Use sandpaper to sand down any humps or a patching compound to fill in depressions to create a smooth surface.
Check the subfloor because any unevenness could cause the new flooring to be uneven and unstable.
Once the subfloor is level, you can proceed with the installation of the new engineered hardwood flooring with confidence. The stable and secure base will ensure a smooth and even installation.
Step #3: Remove Baseboards and Trim
Now that the subfloor is secure and level, it’s time to add a professional touch to your flooring project. For a seamless finish, remove the baseboards and trim the door casings.
Using a pry bar, carefully remove the baseboards by cutting through any caulk or adhesive. This will ensure that your new engineered hardwood will fit snugly against the wall, creating a clean and polished look.
Trimming the door casings is also important in ensuring that your new flooring fits properly. If the new floor is thicker than the old one, you may need to trim the casings to accommodate the difference. This can be done using a saw or a hand-held rotary tool.
Step #4: Install an Underlayment

Before moving on to the next step, ensuring your flooring project is durable and long-lasting is important. You can achieve this by rolling out and securing a 15-pound builder’s felt as an underlayment.
This essential step provides several benefits that will enhance the performance and longevity of your engineered hardwood flooring.
The underlayment helps to reduce noise transmission, preventing sound from traveling through the floor and disturbing your household.
It provides a moisture barrier, protecting your new flooring from any moisture seeping through the existing floorboards.
The underlayment acts as a cushion, creating a barrier between the existing and new flooring and preventing any unevenness from the subfloor from affecting the new flooring.
To ensure that the underlayment is installed correctly, follow these steps:
- Start by unrolling the felt where you will be installing the flooring.
- Cut the felt to the appropriate size, leaving an extra inch at the edges to ensure complete coverage.
- Secure the underlayment to the subfloor using staples or adhesive, ensuring it is flat and smooth.
Step #5: Begin Installation
As you begin the next step in your flooring project, ensure that each row of planks is straight and tightly fitted together.
To secure them to the subfloor, use spacers and a brad nailer. Maintaining an appropriate expansion gap between the planks and the walls is crucial to prevent buckling and warping. Use a tapping block and mallet to gently tap the planks into place, ensuring a snug fit.
When installing engineered hardwood flooring over an existing hardwood floor, it’s essential to ensure that the existing floor is level, clean, and debris-free.
If there are any loose boards, they must be secured before installation begins. It’s also crucial to consider the height of the new flooring, as it may require adjustments to door frames or baseboards.
Step #6: Complete the Installation
To complete the installation, it’s time to add the finishing touches with baseboard trim and fillers for a polished look.
After removing the spacers used during installation, begin by installing the baseboard trim around the room’s perimeter.
This will help cover any gaps between the wall and the flooring and provide a smooth transition from the floor to the wall. Be sure to use a trim that complements the color and style of your flooring.
Once the trim is installed, fill any nail holes or exposed metal with the appropriate fillers. This will help create a seamless look and prevent moisture or debris from getting under the flooring.
How level does a floor need to be for engineered hardwood?
For engineered hardwood, the subfloor must be level within an eighth of an inch over a 10-foot span. This is because unevenness can result in dips, squeaks, and gaps in the flooring.
Applying a floor-leveling compound can mitigate any variances and ensure a smooth, sturdy surface for installation.
Remember that different flooring types may have different requirements for subfloor levelness, so always check with the manufacturer’s guidelines before installing.
Can you recoat hardwood floors without sanding?

Hardwood floors can be recoated without sanding using various techniques such as mechanical or chemical methods.
Recoating your wooden floor is an excellent way to restore it without extensive sanding and refinishing services.
Mechanical methods involve buffing machines that remove surface scratches and dullness before applying the new coat.
Chemical methods, on the other hand, use a chemical solution to etch the old finish away and create a bonding surface for the new coating.
How thick should the underlay be for engineered wood flooring?
The engineered or solid wood flooring underlay should be at most 5 mm in thickness for optimal stability.
Anything thicker than 5mm could destabilize your new flooring. This is a significant distinction between underlays for carpet and laminate flooring.
When choosing an underlay, select one specially designed for engineered or solid wood flooring and avoid too thick materials.
Opting for the right underlay will ensure a firmer foundation for your new floor, increase longevity and provide excellent sound insulation.
Upgrade Your Flooring with Engineered Hardwood Over Existing Hardwood
Upgrading your flooring by installing engineered hardwood over existing hardwood is entirely feasible, provided that the existing hardwood is in good condition.
Proper preparation, evaluation of the condition and comprehensive understanding of the process and subfloor requirements are crucial for a successful installation.
By following the steps outlined above and choosing the right underlay for your flooring, you can give your home a stunning new look and increase its overall value.