Last Updated on July 10, 2023
Replacing the floor in your bathroom is a typical home improvement project. Sometimes the slab is uneven, cracked, or warped. The floorboards squeak, and the room smells musty, which are two other reasons you may want to upgrade the flooring.
You don’t want to remove the toilet but need to rebuild the ground. Perhaps you’re wondering how you can replace the bathroom floor without removing the toilet?
You can easily do it if you follow our process carefully. If you don’t, you might ruin the surface. We will share a variety of methods for different materials so that you can successfully achieve this home improvement project.
How to Replace Bathroom Floor without Removing Toilet?

Every bathroom should have a good floor. It plays a crucial role in the aesthetics of the space and must also withstand heavy foot traffic and moisture. If you need to replace the old flooring, installing it can be a challenge.
One of the most challenging aspects is installing it without removing the toilet. This is because the weight of the commode can crack the freshly laid tiles. Here are a few methods that will help you do just that.
Method 1: Using Vinyl Tile:
If you plan to install a vinyl floor, you’ll be amazed at its simplicity. This project can be completed in just a few hours, and the results will look great. Here are the steps you need to follow:
Step 01. Remove the Old Flooring:
Use a utility knife to score the surface of the vinyl, then pry it up with a putty knife or chisel. If your bathroom has old floor tile, chisel it up with a hammer and cold chisel. Protect your eyes by wearing goggles when working with debris.
Step 02. Clean the Subfloor:
Sweep up any debris and vacuum thoroughly to remove any remaining dirt or dust. Install a new vapor barrier. If your bathroom doesn’t have one, roll out a sheet of 6-mil polyethylene plastic and secure it with double-faced tape around the perimeter of the room.
Step 03. Cut the Vinyl Tiles:
Measure the width and length of the space and add about 3 inches to each measurement for waste. Mark these dimensions on a piece of backing paper and use a straightedge and utility knife to cut through both layers of the vinyl tiles.
Step 04. Place the Tile:
Spread adhesive onto the subfloor using a 1/16-inch notched trowel held at a 45-degree angle, then Set the first tile into place at one end, using a slight twisting motion to help it adhere to the adhesive evenly. Repeat this process until each tile is in place. Allow the adhesive to dry before walking on the new floor.
Method 2: Using Porcelain Tile:
Replacing a bathroom floor is a big project, but it’s one that you can do on your own if you have the time and patience. Porcelain tile is a great material for bathroom floors because it’s durable and easy to clean.
Plus, it comes in a variety of colors and designs to match any style. Here’s how to replace your bathroom floor with porcelain tile:
Step 01: Start by removing the old flooring material. You can score the surface with a utility knife, then remove it with a crowbar. If there’s adhesive residue left behind, use a floor scraper to clean it.
Step 02: You’ll need to prep the surface before laying down the new tile. Repair any cracks or holes in the subfloor with wood filler or concrete patch. Then, sweep and vacuum the area to remove all debris.
Step 03: Now it’s time to start putting down the tile. Lay it down, starting in one corner and working your way to the other. Use spacers between each tile to ensure even spacing.
Afterward, mix up some grout according to the manufacturer’s instructions and spread it over the area with a rubber float. Use a sponge to remove extra grout, then allow the area to dry before use.
Method 3: Using Ceramic Tile:

Ceramic tile is an attractive flooring option for bathrooms. While the system is a bit of a challenge to install, the results are well worth the effort. Follow these steps for ceramic tile installation:
Step 01: Begin by taking the existing tile out. If you are working with a tile floor, use a chisel and hammer to carefully remove each tile. Be sure to wear gloves and eye protection to avoid injuries.
Step 02: Once the old flooring has been removed, clean the subfloor thoroughly. Any dirt or debris will make it difficult for the new tile to adhere properly. Lay out your tiles in the desired pattern. This will help you to determine the best way to cut and place the tiles.
Step 03: When you are ready to begin the installation, spread a layer of mortar on the subfloor and set the tiles in place. Use a level to ensure that each tile is even with its neighbors. In order to grout the tiles, allow the mortar to dry first.
Step 04: Fill in the spaces between the tiles with the grout you’ve mixed and spread. Wipe away any excess grout with a wet sponge. Dry the grout completely before you walk on it.
Method 4: Using Granite Tile:
Granite tile is more durable than standard ceramic tile. Best of all, it’s not that difficult to install yourself. With a little effort and some basic DIY skills, you can give your bathroom a brand-new look by installing granite tile flooring.
Here’s a step-by-step guide to help you get started:
Step 01: You’ll need to use a power drill and chisel to remove old tile and a pry bar to remove vinyl or linoleum. You should wear safety glasses and gloves to protect yourself from flying debris. Now thoroughly clean the subfloor with a vacuum and damp mop.
Step 02: Consider the size of your bathroom and the placement of fixtures when you’re planning your design. Use a chalk line to mark where you’ll need to make cuts. Cut tiles with a wet saw, being careful not to crack them.
Step 03: Begin by spreading the floor adhesive with a notched trowel. As you work, be sure to clean up any adhesive that squeezes up between the tiles.
Put the tiles down and press them gently into the adhesive. You need to cut tile near the toilet flange with a hole saw or jigsaw to fit around the base of the commode bowl.
Step 04: Use a rubber mallet and spacer blocks to tap the tiles into place and create even joints. After the adhesive has had time to set, prepare the grout.
Use a rubber float to spread the grout over the tiles, working it into the joints. Wipe off excess with a damp sponge. Once the grout is dry, apply a sealer to protect it from stains and moisture.
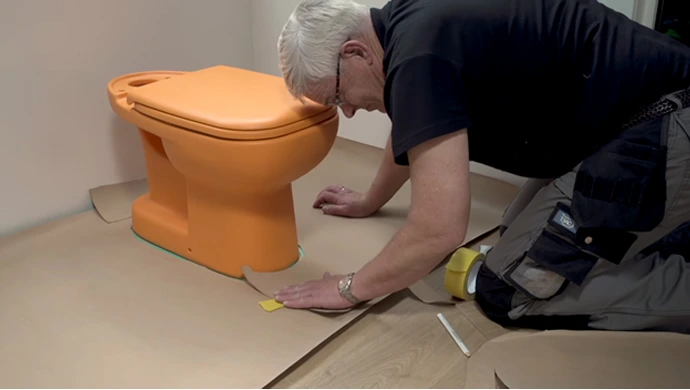
Method 5: Using Laminate:
A bathroom floor replacement is a big task, but it’s one you can do yourself with some time and effort. Laminate flooring is a popular choice for bathrooms because it resists moisture and is easy to install. Here’s how to install laminate in steps:
Step 01. Remove Existing Flooring:
Turn off the water to your toilet. Disconnect the flange bolts that connect the commode to the floor. Start by removing any baseboards or trim pieces. Then, use a sharp knife to scrape the caulk at its edge. This will make it easier to peel off the old flooring.
Step 02. Prepare the Surface:
Use a damp mop to clean the floor of any dust or debris. Now you should check the moisture level. If the humidity is too high, it can cause the laminate flooring to warp. You can test it with a pin meter. Make sure that the subfloor is level and free of any nails or other sharp objects.
Step 03. Install the Underlayment:
You should begin installing the underlayment. This subfloor material is essential for protecting the laminate from wetness and creating a smooth, level surface. When installing it, be sure to leave a 1/4-inch gap on all sides to allow for expansion.
To install the underlayment, start by spreading a layer of adhesive on the floor. Then, lay down the underlayment in strips, making sure to overlap the edges. Once all of the underlayment is in place, use a roller to press it down and ensure a tight bond.
Step 04: Cut and Install the Laminate Planks:
You must first measure the bathroom floor per square foot and determine how many planks to use for laminate. Then, using a saw, cut the planks to size. Once the planks are cut, you can begin installing them.
Start in one corner and work your way out. Don’t forget to use a leveler to ensure that the planks are installed evenly. When you reach the toilet, you may need to cut a hole in one of the planks so that it fits around the closet flange.
Step 05. Install Molding and Trim
Cut the molding to size using the handsaw. Drill pilot holes into the molding using the power drill. Attach the molding to the laminate planks using 1-inch screws, then fill in any nail holes with wood putty.
This will help to secure the laminate planks in place and create a finished look. Once the putty is dry, sand it down and paint or stain the molding to match your bathroom décor.
Method 6: Using Linoleum:

The beauty of Linoleum is that it can be installed over existing flooring, which makes it a common choice for many busy households. If you’re planning to install it in your bathroom, follow these steps:
Step 01. Shutting off the Water Supply to Your Toilet:
Find the main faucet shut-off valve for your home. This is usually located in the basement or utility room. Once you’ve located the valve, turn the knob clockwise to stop. Flush the toilet to empty the tank and bowl.
Once the bowl is empty, place a rag over the flush valve to prevent any residual sewage from entering. Unscrew the two nuts that hold the water supply line in place and remove the line from the bowl.
Step 02. Measure the Area of the Floor:
Use a tape measure to determine the length and width of the room. Then, subtract the size of the toilet from the total area. This will give you the amount of space that you have to work with.
To calculate the amount of linoleum needed, multiply the length by the width. Calculate the square footage of the area. Round up to the nearest foot to account for waste. This will ensure that you have enough material to finish.
Step 03. Remove the Damaged Tile:
Start by chipping away at the grout around each tile with a chisel. Use a hammer to gently tap the tile until it loosens from the adhesive beneath. Carefully remove the tile and dispose of it. If necessary, use a putty knife to scrape away any remaining adhesive.
Step 04. Cut the Linoleum:
Start by cutting the linoleum to size, then apply adhesive to the back of the linoleum. Use a razor blade to cut the linoleum along the edges of the room. In this way, the linoleum lies flat against the floor.
Cut the linoleum around the toilet flange so that it can go around the toilet base. Lay down the linoleum and roll it with a roller to apply pressure.
Step 05. Trim any Excess material and Seal the Edges:
You will need to trim away any excess material. This will help ensure a clean, professional-looking finished product. Apply a sealant to go over the seams and prevent water from seeping in. Let the sealant dry completely before using the bathroom again.
FAQs:
Q: Do You Have to Remove the Toilet to Install Laminate Flooring?
If you’re not comfortable removing the toilet, you can simply cover it with a piece of plywood or laminate. This will raise the height of the floor around the commode, but it’s usually not noticeable once the trim is in place.
A flange is generally not level with the surrounding surface, so it is usually best to take out the toilet before installing laminate flooring. It creates more work and can be difficult if you’ve never removed a toilet bowl before.
Q: Is Tiling over Tiles a Good Idea?
You can lay new tile over old tile, provided that the surface is level and in good condition. However, there are a few things to keep in mind before starting your project. First, the surface of your existing tiles will need to be completely smooth in order for the new tiles to adhere properly.
If there are any cracks or chips in the old tiles, you’ll need to repair them first. In addition, always check that old tiles are firmly attached to the subfloor; otherwise, they could come loose when you add the new layer of tile.
Q: What Type of Flooring Can You Put over Ceramic tiles in the Bathroom?
When ceramic tile is cracked, one popular option is vinyl plank flooring, which offers the look of wood or stone with the durability and easy care of vinyl. Another option is luxury vinyl tile, which can replicate the look of real tile at a fraction of the cost.
This type of flooring is softer than ceramic tiles, so it’s more comfortable to stand on. It’s also easy to clean and maintain. Moreover, either type of vinyl flooring can be installed directly over the top of porcelain, as long as the tile is level and not cracked.
Q: Does Flooring Go under Toilet Flange?
During a bathroom remodel, you may be wondering if the toilet flange needs to be installed before or after the flooring. The answer depends on the type of surface you are using. If you are using tile, stone, or another rigid surface, it is wise to install the flange first.
As a result, the bracket is level with the rest of the floor and will prevent any damage to the tile. When installing a softer flooring material, such as linoleum or vinyl, you can install it after the installation.
Conclusion:
Replacing the floor tile will now be easy without removing the commode if you follow our discussed steps. This guide has provided the detailed instructions you need to install different types of bathroom floors over the old ones. You can quickly replace the bathroom floor without removing the toilet, using a few tools and supplies on hand.
Of course, this job is best left to a professional if you’re not confident in your own DIY skills. But if you’re up for the challenge, don’t forget to measure the space and choose the right materials for your project. With a little bit of effort, you can have a new floor tile.
You Might be Interested:
- Is it possible to do a paper bag floor on concrete?
- Why Do People Make Mistakes When Removing a Bathtub?
- How can I waterproof my door effectively?