Last Updated on June 13, 2023
Water is one of the most damaging substances to a kitchen floor. Whether it’s from a spill, a leaky appliance, or flooding, water can deteriorate carpet material.
The result of all this is that the kitchen surface may warp, buckle, or develop signs of mildew, mold, or mold growth, which are unsightly and costly to repair.
The longer you wait, the more likely it is that the destruction will become irreparable. If you are wondering how to fix the kitchen floor, and you can’t figure it out right away.
It is fortunate that there is a solution to restoring it once it has been submerged by water. If you take the time and effort to do the work correctly, you can fix or replace damaged flooring and return your kitchen to its original condition.
How to Fix a Kitchen Floor: 7 Steps to Fix Water Damaged Area

Water Damage to your Kitchen Floor can happen in many ways. A broken pipe, a leaky refrigerator, or even excessive humidity can all lead to warping, staining, and other complications.
If you’ve noticed any of these issues in your own kitchen, it’s wise to take action quickly. If you take action as soon as possible, you reduce the risk of permanent loss.
Here are the eight steps you need to take to fix your wet kitchen floor, but before you start, remember to take these precautions:
- Disconnect all electronics and appliances from the power source to avoid electrocution.
- Move any furniture or other items out of the way to create a clear working space.
- If the water is still actively leaking, try to contain it by placing a bucket or other container under the leak.
- Inspect the situation to determine whether you need to fix or replace your flooring.
- If the water has already been cleaned up, make sure to dry the area completely before proceeding.
- Take the necessary tools and materials to fix it.
As soon as you have taken the above precautions, you are prepared to begin your repair project.
1. Stop the Water Source
If you have standing water or a constant leak in your kitchen, you need to stop it before you can fix the floor. Check for any obvious drips, such as a faucet that is dripping or pipes that are leaky.
If you can’t find the source of the flooding, it may be coming from the dishwasher, refrigerator, or another appliance. To stop the leak, you will need to turn off the water in your entire home.
Once the water is shut off, mop up any standing moisture and allow the area to sufficiently dry. Then, you can begin assessing the problem and making repairs.
2. Remove Damaged Flooring
Now that you have stopped the water source, it is time to remove the damaged kitchen flooring. This can be a difficult and time-consuming task, but it is essential in order to protect your investment and avoid further deterioration.
First, use a utility knife to score your vinyl flooring or a linoleum surface. This will help the adhesive bond to the new carpet. Next, use a putty knife to scrape up as much rotten flooring as possible.
Be sure to wear gloves and protective eyewear to avoid injury. Once the majority of the old material has been removed, use a shop vac to suck up any remaining debris. Now you are ready to replace the flooring.
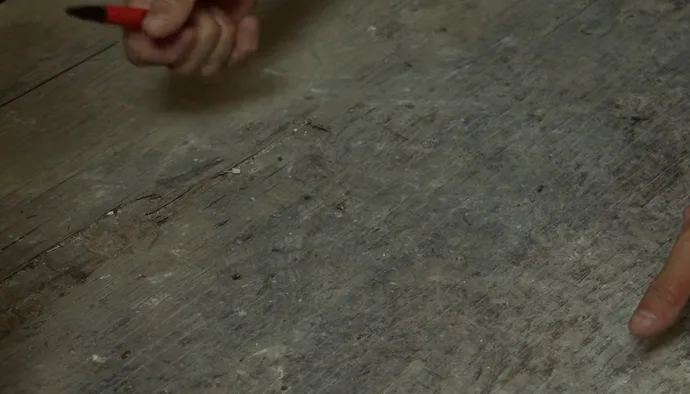
3. Mark Your Spot
After removing the worn and old flooring, it’s time to take a good look at the basement. This is the layer of plywood or particle board that provides support for the actual surface material.
Once you’ve determined whether or not the subfloor needs to be replaced, it’s time to mark the spot for your new kitchen refinishing. This is where careful measuring comes in handy.
You’ll need to take into account the size and shape of your room, as well as the size of your new kitchen hardwood floor or planks.
To mark the edges of the area where you will lay the linoleum, use a pencil or chalk as a guide. This will give you a clear guide for cutting and installing your new floor.
4. Carefully Cut the Subflooring
Work gloves, a dust mask, and eye protection are a must when cutting the kitchen subflooring. Using a circular saw set to a 1-inch depth, carefully cut out affected areas by following your chalk mark guides. Cut as close as possible to the floor joist for stability and to avoid future issues.
With the ruined areas cut out, take measurements for new kitchen subflooring pieces using plywood or oriented strand board. Account for any fixtures in the room, such as cabinets or appliances that will get in the way.
Also, make sure to leave an extra 1/4 inch on each side to allow for expansion and contraction of the kitchen surface due to changes in temperature and humidity.
Once you have your new pieces, apply construction adhesive to their backs and fit them into place. Secure the new subflooring in place with screws driven every 6 inches along the edges and every 12 inches in the field. If you’re using OSB, be sure to use nails instead of screws.
5. Prep the Floor
The next step is to prep the kitchen floor. This means making sure that the surface is clean, level, and free of any debris. The easiest way to do this is to use a specifically-designed ground prep tool. These can be rented from most hardware stores.
To use, simply attach the tool to a drill and run it over the surface of the kitchen floor. This will remove any old adhesive or grime, leaving the ground ready for the new tile.
If you don’t have access to a countertop prep tool, consider using a manual sander. You should go over the entire area multiple times to ensure that it’s completely smooth before proceeding to the next step.
6. Reinforce the Floor Joists

With the kitchen subflooring in place, it’s time to move on to the structural joists. These are the horizontal beams that support the wooden decking. If your joists are ruined or excessively weak, they will have to be fixed or reinforced before you can proceed.
Replacing a few broken boards is a fairly straightforward process, but reinforcing the entire span of the joists is a major undertaking. The best course of action is to consult with a structural engineer to determine what to do.
In some cases, it may be necessary to add additional supports, such as steel beams or posts, to carry the load.
7. Install the New Flooring
After the subflooring is secure, it’s time to lay the brand-new surface. This may be vinyl, tile, linoleum, or wood flooring. If you are installing a wood deck, make sure the boards are the correct width and thickness for the type of flooring you have chosen.
For example, thinner boards are typically used for engineered wood floors. It is also important to pay attention to the direction of the pieces. Once the boards are laid out, Secure them to each other and to the kitchen subfloor with nails or screws.
Be careful not to over-tighten the fasteners, which could cause the boards to warp. After the new flooring is in place, trim any excess material and install baseboards or moldings to give the room a finished look.
So there you have it. You will notice an improvement in the appearance of your kitchen floor tile right away. Just learn from the instructions carefully, take your finest shot, and achieve an excellent result.
FAQs
It’s inevitable that you will have questions along the way. Here are some of the most frequently asked questions about fixing a kitchen floor.
What is the Easiest Kitchen Flooring to Install?

When it comes to kitchen flooring, there are a lot of options to choose from. The tile, hardwood, and laminate floor are all popular choices, but each has its own set of pros and cons.
If you’re looking for easy-to-install kitchen flooring, vinyl or laminate flooring is the clear winner. Available in sheets, tiles, or luxury vinyl planks, it can be installed quickly and easily over most existing floors.
Plus, vinyl is among the most inexpensive putting-in options available, making it a great choice for budget-conscious homeowners. Whether you’re installing a new kitchen floor or simply giving your old one a refresh, vinyl is a great option to consider.
How Long Does It Take to Replace a Kitchen Floor?
Kitchen floors take a lot of abuse, so it’s no surprise that they sometimes need to be replaced. If you’re handy with power tools, you can usually install new flooring in a kitchen in two or three hours, depending on the size of the room.
However, if you’re not as experienced, it’s probably best to add an extra hour or two to account for any difficulties you might have fitting the flooring around cabinets or other obstacles.
Either way, it’s a good idea to have someone else on hand to help, especially if you’re working with large pieces of kitchen flooring.
Can Water-Damaged Wood Floors Be Fixed?

Water damage is typically one of the worst things that can happen to hardwood floors. If not caught and dealt with immediately, it can cause the material to warp, cup, and break. Wood kitchen floors that have been wet can be fixed if the deterioration is not too severe.
Refinishing may be required in some cases. In cases where the issue is more severe, patching will probably be needed. Even worse, the floor might have to be removed and replaced. Even though stained hardwood floors can’t always be salvaged, it’s worth trying.
What Can I Use for Kitchen Floor Protection?
There are many things that can be used to protect kitchen floors. Things like mats and rugs can help to protect your floor from dirt, water, and other things that can cause stains.
You can also use things like plastic or foil to line your cabinets and drawers to catch drips and spills. In addition, you can use non-slip mats in front of the sink and stove to prevent accidents.
Conclusion
Now that you know how to fix kitchen floor, it’s time to get started. With these steps, your kitchen area will look as good as ever. The process of replacing your kitchen surfacing may seem daunting, but it’s not as difficult as you might think. Just be sure to follow the instructions carefully and be patient, and with the right tools, you’ll be sure to get excellent results.
So if your kitchen floors are looking tired and worn out, don’t wait any longer. Start planning your renovation today, and soon you’ll be enjoying your upgraded kitchen floor.
You Might be Interested: