Last Updated on July 22, 2023
Scratches can occur on your hardwood floor, no matter how careful you are with your flooring. But there are several methods you can try to fix scratches on your engineered hardwood floor.
You can use scratch concealer or touch-up repair kits to fill in the scratches. Another way to eliminate scratches from hardwood floors is to buff them with fine-grit sandpaper or steel wool.
Wax repair kits are another way to hide scratches. Also, staining the floor to match the color of the scratches can minimize their visibility.
We will discuss all these methods in detailed steps. So, let’s get started on repairing those ugly scratches and restoring your floor’s natural beauty.
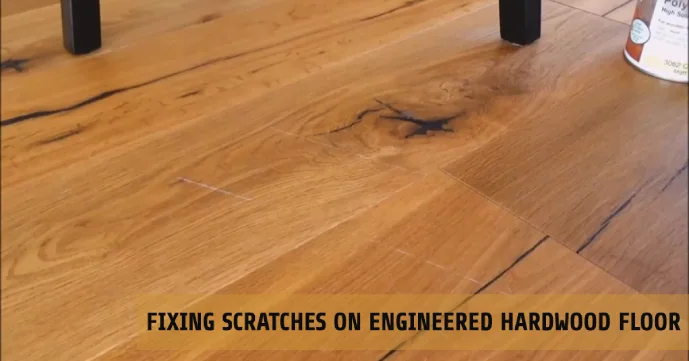
How to Fix Scratches on Engineered Hardwood Floor: Different Methods With Steps

You can fix scratches on engineered hardwood floors in several ways. Here’s a quick look at the methods.
Method 1: Scratch Concealer or Touch-Up Repair Kits
Method 2: Buffing with Fine-Grit Sandpaper or Steel Wool
Let’s look at the methods in detail.
Method #1: Scratch Concealer or Touch-up Repair Kits
If you’re looking for a way to fix scratches in your engineered hardwood floor, one method to consider is using a scratch concealer or a touch-up repair kit. Here’s what you need to do:
Step #1: Clean the Scratched Area
To start, grab a clean cloth and a mild cleaner or rubbing alcohol to give that scratched area a good cleaning. Remember to let it dry completely before moving on to the next step.
Here are a few tips to keep in mind while cleaning the area:
- Use a gentle cleaner to avoid damaging the floor further.
- Be sure to clean the area thoroughly to remove all dirt and debris.
- If using rubbing alcohol, make sure it’s not too strong as it could strip the finish.
- Use a microfiber cloth to prevent any scratches from occurring during the cleaning process.
- Allow the area to completely dry before moving on.
Step #2: Apply the Scratch Concealer
Once the scratched area is clean and dry, use the soft cloth or applicator that comes with the scratch concealer to apply it evenly and smoothly.
Be sure to apply the concealer in a smooth, even motion to ensure a seamless blend with the surrounding flooring. Remember to follow the instructions with the scratch concealer or touch-up repair kit to ensure the best results.
Step #3: Remove Excess Concealer
To ensure a flawless repair, gently remove any excess scratch concealer from the surrounding area using a clean cloth or paper towel. Be careful not to disrupt the repaired spot.
Use a soft, clean cloth or paper towel to wipe away any excess material gently. Be sure to use a light touch and avoid applying too much pressure, as this could cause the repair to become distorted or damaged. Before walking, let it dry completely.
Method 2: Buffing With Fine-Grit Sandpaper or Steel Wool
For scratches on your engineered hardwood floor, you can try buffing it with steel wool or fine-grit sandpaper. Here’s how to do it.
Step #1: Get the Scratched Area Clean
To begin with, sweep or vacuum the scratched area to remove any debris. Don’t let dirt and dust linger on your engineered hardwood floor.
After removing any dirt or debris, use a soft cloth to clean the area. Be sure to eliminate any leftover dust or dirt that may have been missed during the sweeping or vacuuming process. Inspect the area to ensure it’s completely clean and free of any remaining debris.
Step #2: Choose the Right Sandpaper or Steel Wool
Now, you’ll need to select a fine-grit sandpaper or fine steel wool to buff the affected area and restore its natural beauty gently.
Sandpaper with around 220-grit or fine steel wool with 0000 grade is recommended. These options are gentle enough not to damage the engineered hardwood floor further while effectively removing the scratches.
Move toward the grain to avoid creating more scratches or damage when using sandpaper or steel wool. Take your time and work slowly, frequently checking the progress to ensure you achieve the desired result.
Once the scratches are gone, you can move on to the next step in repairing your engineered hardwood floor.
Step #3: Buff the Scratch
Once you’ve selected the appropriate sandpaper or steel wool, gently rub the scratched area toward the wood grain to effectively restore its natural beauty. You need to keep a few things in mind while buffing the scratch.
Here are some tips to help you get the best results:
- Apply light pressure and keep the motion consistent to avoid over-buffing the area.
- Continuously check your progress, especially if the scratch is deep, to prevent damaging the surrounding area.
- Take your time, and don’t rush the process. Buffing the scratch may take some time, but achieving a seamless finish is worth it.
Step #4: Evaluate the Scratch
You need to evaluate the scratch on your engineered hardwood floor. Be careful not to damage the finish or go too deep.
If the scratch appears less noticeable or has disappeared, you can stop the process and admire your efforts. If the scratch is still visible, you may need to repeat the previous steps or seek professional assistance.
Step #5: Wipe Away Debris
After buffing, grab a soft cloth and gently wipe down your floor to remove any leftover sanding debris or residue. Here are three tips to help you wipe away debris effectively:
- Use a microfiber cloth to avoid leaving behind any lint or fibers on the floor.
- Work in small sections to ensure that you don’t miss any spots, and apply gentle pressure to avoid scratching the wood.
- If you notice any stubborn residue or dirt that won’t come off with a dry cloth, you can dampen the cloth with water or a hardwood floor cleaner to help remove it. Just ensure not to soak the floor or leave any excess moisture behind.
Step #6: Seal the Area
Now that you’ve wiped away all the sanding debris, it’s time to give your floor a protective shield like a suit of armor by sealing the repaired area.
Choose an appropriate wood floor sealant or finish and follow the manufacturer’s instructions for application and drying times.
Sealant or finish will act as a barrier against future scratches, scuffs, and stains. Be sure to apply the sealant or finish evenly and avoid leaving any bubbles or streaks. Allow the area to dry completely before walking on it or placing any furniture on it.
Method 3: Wax Repair Kit

You can use a wax repair kit to repair scratches on your engineered hardwood floor. Follow these steps:
Step #1: Clean the Scratched Part
You’ll need to grab a clean cloth and some rubbing alcohol or mild cleaner to clean the scratched area on your engineered hardwood floor thoroughly. Be sure to use a gentle touch when cleaning to avoid further damage.
Once you’ve finished cleaning, allow the surface to dry completely before proceeding to the next step. This is important to ensure that any moisture doesn’t interfere with the repair process.
Step #2: Prepare the Wax
With your wax repair kit in hand, start by following the instructions provided to prepare the wax. This may involve heating a wax stick or using a specialized tool to melt it.
Once the wax is ready, you can fill in the scratches on your engineered hardwood floor. Remember that the scratches can be unsightly and make your floor look worn and damaged.
Step #3: Fill the Scratch With Wax
Apply the wax diagonally using a plastic putty knife or the provided applicator to cover the entire scratch.
When filling the scratch with wax, it’s crucial to ensure that the wax fully covers the damaged area. By using a diagonal motion, the wax will fill in any gaps and create a smooth surface.
Make sure to note that the wax shouldn’t overflow, as excess wax will need to be removed. Once the scratch is filled, allow the wax to cool and harden before buffing the surface with a clean cloth.
Step #4: Remove Excess Wax
Don’t forget to gently remove any excess wax from the surrounding area after filling the scratch, creating a flawless finish that will leave you feeling satisfied with the result. Here are five tips to help you remove excess wax effectively:
- Use a clean cloth to wipe away any excess wax from the surface gently.
- Be careful not to apply too much pressure when wiping, as this can cause the wax to spread and create an uneven finish.
- If there is still excess wax, use a plastic scraper to scrape off the excess carefully.
- Be sure to angle the scraper or card away from the scratch to avoid re-damaging the area.
- In the end, use a clean cloth to buff the area, ensuring that any remaining wax is removed and the surface is smooth and even.
Step #5: Allow the Wax to Cool and Harden
Once the wax has cooled and hardened, it’ll be as solid as a rock and ready for inspection. This is a crucial step in the process of repairing scratches in engineered hardwood flooring.
You must let the wax cool down and harden completely according to the product instructions before proceeding. This may take a few minutes, so be patient. Only try to touch or move the wax once it’s completely solid.
After the wax has hardened, inspect the repaired area closely. Look for any visible scratches or gaps that need to be filled. If you notice any imperfections, repeat the filling process with additional wax until the scratch is fully filled and the surface is level.
Method 4: Staining the Floors

Staining may be a good option if you want scratches fixed. Follow these steps to get started.
Step #1: Thoroughly Clean the Area
After thoroughly cleaning the scratched area with rubbing alcohol or a mild cleaner and ensuring the surface is completely dry, proceed to fix scratches on engineered hardwood floors.
You must ensure that the area is free of any debris or dirt that could interfere with the staining process. Wipe away any remaining residue and allow the area to air dry completely.
Once the area is clean and dry, you can move on to staining the floors. It’s essential to follow the manufacturer’s instructions carefully and use a stain that matches the color of your floor.
Step #2: Choose a Matching Stain
Select a color that closely matches the existing shade and test it on an inconspicuous floor area to ensure it achieves the desired effect. Look for a stain that’s specifically designed for engineered hardwood floors. Consider the type of wood and its natural coloration when selecting a stain.
Step #3: Apply the Stain
Now it’s time for you to bring your floor back to life by applying the matching stain in the direction of the wood grain, following the manufacturer’s instructions carefully.
Use a clean cloth or brush and work the stain into the wood to ensure even coverage. Remember to apply the stain evenly and avoid leaving any excess or missed spots.
Take your time and work carefully to achieve the best results possible. It may be helpful to test the stain on a small, inconspicuous area first to ensure that the color matches properly.
Step #4: Allow the Stain to Penetrate
Ensure you give the stain enough time to penetrate the wood and achieve the perfect color, as this will ultimately determine the overall look of your newly restored flooring.
Here are four things to keep in mind when allowing the stain to penetrate:
- Read the instructions on the stain carefully to determine the ideal length of time for penetration.
- Consider the type of wood and the amount of damage or wear on the floor when deciding how long to let the stain sit.
- Keep the area well-ventilated during the penetration process to avoid inhaling any fumes.
- Check the color frequently while the stain is soaking in to ensure that it’s progressing as desired.
Step #5: Wipe Off Excess Stain
You’ll need to use a clean cloth to gently wipe off any excess stain from the surface, ensuring that your newly restored flooring has an even and polished look.
Using a circular motion, be sure to remove any excess stain that may have built up on the surface, taking care not to apply too much pressure or scrub too vigorously.
Once you’ve finished wiping off the excess stain, stand back and admire your handiwork.
Step #6: Let the Stain Dry
After patiently wiping off the excess stain, you must let the stained area dry completely according to the manufacturer’s instructions. This allows the stain to set and the true color to emerge.
The drying time may vary depending on the type of stain used, so it’s crucial to follow the recommended drying time to avoid any potential issues.
Make sure the area is well-ventilated to promote faster drying. Also, avoid stepping on the area until it’s completely dry to prevent any further damage.
How do you keep your engineered hardwood floor from scratching?

You can take several preventive measures to keep engineered hardwood floors scratch-free. You can attach felt or rubber pads to the bottom of furniture legs to prevent them from scratching the floor when moved or dragged.
Also, strategically place rugs or mats in high-traffic areas to minimize direct impact on the floor. Encourage household members and guests to remove high-heeled shoes or shoes with spikes before walking on the floor to avoid scratches.
Keep your pets’ nails trimmed and provide designated scratching posts or pads for them. Use protective mats under desk chairs in work areas to prevent chair casters from scratching the floor.
A protective polyurethane coating can also protect against scratches and wear. Avoid dragging heavy objects across the floor. Use furniture sliders or lift and carry them.
How can you find the best polyurethane for hardwood floors?
Finding the right polyurethane for hardwood floors involves considering a few key factors. You need a polyurethane that’s resistant to scratches, stains, and wear.
Consider the sheen level as well, whether you prefer a high-gloss, semi-gloss, or satin finish. This will depend on your personal preference and the overall aesthetic you want to achieve.
If you’re looking for a hassle-free way to find the most effective polyurethane for hardwood floors, consider checking out our review. We have already done the research and evaluation to provide you with a curated list of top-rated polyurethane products.
By checking our review, you can save time and effort in finding the best polyurethane for hardwood floors suited to your needs.
Can you use super glue to repair scratches on the engineered hardwood floor?
Using super glue to repair scratches on engineered hardwood floors is not recommended. Superglue can leave a permanent and noticeable mark on the flooring, which may worsen the damage.
Instead, it is best to use repair methods that are specifically designed for engineered hardwood floors, such as wax repair kits or touch-up markers. These methods are more effective and will maintain the appearance of your flooring.
Will fixing scratches on my engineered hardwood floor change its color or appearance?

The repair of scratches on engineered hardwood floors using proper repair methods like wax kits or touch-up markers will remain the same color and appearance.
These methods blend the repaired area with the rest of the floor to match the color and achieve a seamless repair. A correct application will keep the original color and make the floors look new.
Therefore, you can expect a successful repair without any noticeable difference in the overall appearance of your floor.
Restore Your Engineered Hardwood Floor with Ease
Fixing scratches on your engineered hardwood floor is a manageable task with several effective methods at your disposal. Whether you choose scratch concealer, touch-up repair kits, sanding and buffing, wax repair kits, or staining, each approach offers a solution to restore the beauty of your flooring.
Also, implementing preventive measures, such as using furniture pads and strategically placing rugs. Avoid dragging heavy objects, which can help minimize future scratches.
Remember to prioritize your floor’s specific needs and characteristics to select the most suitable method. You can enjoy a pristine, scratch-free, engineered hardwood floor for years with patience, care, and the right techniques.