Last Updated on November 7, 2022
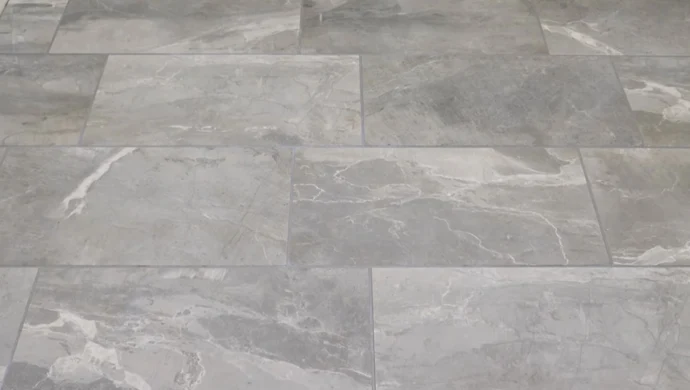
Have you ever noticed that some floor tiles are slightly raised in the middle? This is a condition called warping, and it’s a pretty common problem with tiles. It’s usually caused by moisture seeping into the tile and causing it to expand.
The problem of warped tiles is common both in old and new homes. In most cases, warped tiles result from moisture damage, which can cause various problems in your home, from water leaks to mold growth.
Warped tiles need to be fixed right away. But to solve the problem, you need to figure out how to fix warped tiles without causing further damage. You can damage your tile flooring if you neglect it, and it can become difficult to clean.
How to Fix Warped Tiles : 3 Steps
It is common for tile floors in homes to have warped tiles. Identify the source of the problem. If the tiles were poorly installed, the entire floor tile would likely need to be replaced.
On the other hand, if the warp is due to humidity changes or other factors, it may be possible to salvage the existing floor.
Once you have identified the cause of the problem, you can begin repairs. To solve the problem of warped tiles, you need to follow these steps:
1. Apply Heat to the Warped Tile:
One method of repairing warped tiles is to apply heat to the tile. This will cause the tile to expand and hopefully flatten out. You can use a hair dryer, a heat gun, or a heat lamp for heating. Aim the heat at the center of the tile and move it back and forth until the tile is evenly heated.
You may need to apply heat for several minutes before you see results. This method is not recommended for ceramic tile, which may crack from the heat. Also, be careful not to overheat the tile, as this can damage the adhesive and cause further problems.
2. Use a Weighted Object:
The other way to fix the tile warpage is to place a heavy object on top of the tile. This will help to flatten out the tile. Make sure that the object is evenly weighted and will not move around. You may need to place something heavy on each corner of the tile to flatten it out completely.
Be patient and check the tile periodically to see if it has flattened out. It may take a few days for the tile to flatten out completely. If the tile doesn’t flatten out after a week, you may need to replace the tile.
3. Replace the Affected Tiles:
If the previous methods do not work, you will probably need a new tile. This is the most effective way to fix warped tiles and prevent further water damage. To replace a tile, you will need to remove the old one and install a new one.
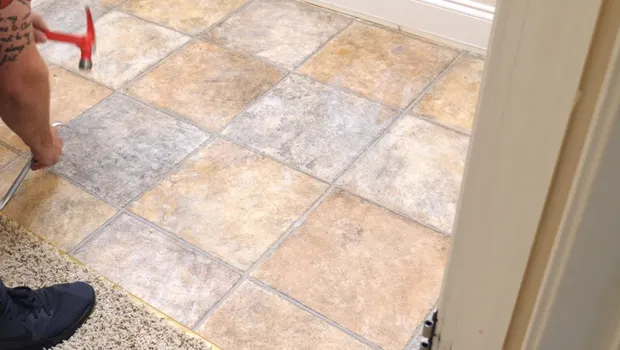
You need to understand how to remove warped tiles without damaging them. The easiest way to do this is to use a putty knife or a chisel to pry the tile up from the floor gently.
What are the steps for replacing wrapped tiles?

If the tile is cracked or broken, you may need to use a hammer to break it into smaller pieces before removing it. Then try to remove the cracked tile in one piece. If it breaks, that’s okay.
You can use a hammer and chisel to split it up. Just be careful not to damage the surrounding tiles. This process can be time-consuming, so be patient and take your time.
To replace the affected tiles, you will need to follow these steps:
Step 01. Clean the Area
It is essential to clean the area around a warped tile before attempting any repairs. Loose grout or mortar can cause further damage and make it difficult to get a clean repair.
You can remove loose material around the tile using a putty knife or other sharp tool. Once the area is clean, you can proceed with your repair without worrying about further water damage.
Step 02. Inspect the Subfloor
The subfloor is the layer of material that sits beneath the tiles. It is typically made of wood flooring or concrete. Tiles can warp or bubble if the laminate hardwood flooring is not level. Use a level to check the subfloor for any unevenness.
Before proceeding, level the subfloor if it is not level. Also, make sure the subfloor is not damaged by water. Before proceeding, you should dry out the subfloor.
Step 03. Apply Adhesive
Once the subfloor is dry and level, the tile can adhere to the subfloor with adhesive. Make sure that the adhesive is evenly distributed. You can use a notched trowel to help with this process.
Following the placement of the adhesive, carefully set the tile into position. Check the tile with a level, and then press it into place. Make sure the tile is aligned correctly with the surrounding tiles as well.
Step 04. Apply Grout
After the tiles are installed, applying grout around the edges is necessary. Ensure that the grout is evenly distributed and that there are no gaps between the tiles. Once the grout is in place, use a damp cloth to remove any excess.
If the grout is too dry, the tiles may warp. If the grout is too wet, it can cause the tiles to stain. Also, make sure that the grout is mixed adequately before applying it. If the grout is not mixed correctly, the tiles might warp.
Step 05. Allow the Area to Dry:
Once the adhesive and grout are in place, you must let it dry. This process can take several hours or more, so be patient. This is an important step in the process, so do not skip it.
If the tile is level and aligned correctly, you can inspect it once the surface has dried. When it’s not, you can repeat the previous steps until the tile is level and properly aligned.
What Causes Tiles to Become Warped?
One of the most common problems with floor tiles is that they can become warped or bubbled. Various factors can cause this, but the most common is moisture. They can absorb and swell in excessive moisture, causing them to warp or bubble.
Other causes of warped tiles include:
- Temperature changes: One of the most common causes of warped tiles is exposure to extreme temperature changes. When tiles are heated or cooled too rapidly, they can expand or contract, resulting in a permanent distortion.
- Poorly installed tiles: Poor installation is one of the leading causes of warped tiles. If the tiles are not laid down correctly, or the grout is not applied evenly, they will not be able to bond properly with the surface beneath them. This will eventually cause them to loosen and warp.
- Defective tiles: Sometimes, warped tiles are the result of manufacturing defects. The most common cause is when the clay used to make the tile is not mixed correctly, resulting in uneven shrinkage during firing.
- Adhesive problems: When it comes to tile installation, the adhesive is just as important as the tile itself. If an adhesive is not cured correctly before tiles are installed, it can cause the tiles to warp.
- Subfloor problems: If the surface that the tiles are laid on is not level, it can put stress on the tiles and cause them to become distorted. Also, if the subfloor is not adequately reinforced, it can flex and cause the tiles to lose.
- Grout problems: Incorrect grout application is a common cause of warped and bubbled tiles. If the grout joint is too thick, it can put undue pressure on the tiles and cause them to warp.
How to Fix Pop-Up Tiles?
When you have tile floors, inevitably, one (or more) of the tiles will eventually pop up. It’s just a matter of time and wears and tear. The good news is that it’s not that difficult to fix pop-up tiles yourself.
You’ll just need a few tools and materials, and then you can get to work. The following items will be needed:
- A hammer
- A chisel
- A putty knife
- New tile adhesive
- New grout
- Leveling tool
- A damp cloth
Here’s How to Fix Popped-Up Tiles:
- Use a putty knife to loosen the tile from the adhesive.
- Carefully remove the tile from the floor. Be careful not to break it.
- Apply a new layer of tile adhesive to the back of the tile.
- Place the tile back in its original position and press it into the adhesive.
- Use a level to ensure the tile is level with the surrounding tiles.
- Apply grout around the edges of the tile.
- Use a wet rag or sponge to wipe away any excess grout.
- Allow the area to dry completely before walking on it.
Following these steps should help to fix your problem tiles. Sometimes, it takes a few tries to get it right. But eventually, you’ll have fixed tiles that look as good as new.
Repair Warped Tiles to Avoid the Risk
The information contained above will assist you in understanding how to fix warped tiles. It’s essential to be patient and take time when doing this repair, as rushing can lead to further damage.
Warped tiles can be fixed if you take the time and do it right. You can also avoid warped tiles by considering why they got warped in the first place issue in the future. Having repaired your warped tiles, you’ll have peace of mind knowing that your floors are level and safe once again.
Topics that Interest You:
- What are the benefits of tiling over a marble fireplace?
- What is the best way to level a shower floor before tiling it?
- Can thin quartz be used to cover tile countertops?
- The Easy Way to Fix Gaps Between Backsplashes and Walls
- What is the best way to lighten the tile without removing it?