Last Updated on June 13, 2023
Many homes have concrete floors, which can be susceptible to moisture and cold. Concrete is a very hard surface, making it difficult to install certain types of flooring. To address these issues, cover the concrete floor with Polywood in order to increase the subfloor height.
This will create a more level surface for installing flooring and will help to insulate against cold and moisture. Hence, it is highly significant to make sure that the plywood is properly attached and protected from mud so as to avoid future problems.
We have created a comprehensive guide to address the question, “Can I Put plywood over a concrete floor?”. These steps will cover everything from preparing the surface to sealing and protecting the finished product.
Can I Put Plywood over Concrete Floor and How to Level it?
The answer is yes, you can lay plywood over existing concrete, but there are some considerations to make in ensuring the surface is placed and leveled up properly.
Any misaligned level can cause issues with doors and appliances and even make it difficult to walk between rooms. That’s why we have to take care of it.
Here is a step on step guide on how to put plywood over a concrete floor and level it:
Tools and Materials Needed

Before you start, you will need some basic tools and materials. The most vital thing to remember is to have everything on hand before you begin, as this will make the process much easier.
- Plywood
- Adhesive
- Circular saw or Jigsaw
- Safety goggles
- Dust mask
- Leveling compound
- Sealer
When you have gathered all of the necessary tools and materials, you are ready to begin.
Step One: Preparing the Surface
Before you can lay down a new floor, you need to make sure the surface is clean and level. Start by sweeping away any dirt or debris, then use a damp mop to remove any stubborn stains. Once the floor is clean, check for any cracks or holes.
These can be repaired with concrete filler or patching compound. Once the repairs are dry, sand the area smoothly. If the hardwood floor is very uneven, you may need to level it with a self-leveling compound. Once the surface is prepared, you’re ready to go for the next step.
Step Two: Measuring and Cutting the Plywood
When you’re installing plywood subflooring, it’s important to get the measurements right and to cut the plywood correctly. The first step is to measure the area where you’ll be installing it. You’ll need to add an extra inch to both the length and width measurements to allow for trimming.
Once you have your measurements, mark them out on the plywood with a pencil. Then, using a straight edge or a saw, cut along the lines you’ve marked.
As a rule, guarantee your cuts are straight so as to prevent any gaps between the plywood panels. Finally, before you install the plywood, test-fit it in the space to make sure it fits correctly.
Step Three: Applying Adhesive and Laying Down the Plywood

Applying adhesive to a concrete floor before laying down plywood is important for establishing a strong bond between the two materials. The type of adhesive used will vary depending on the kind of plywood being laid down.
For example, if you are using pressure-treated boards, then you’d better use an exterior-grade adhesive. Once the adhesive has been spread over the floor, the plywood can then be laid down.
Before moving on to the next one, make sure that each sheet of plywood is properly aligned. Once all of the plywood has been laid down, ensure that you check for any gaps or seams that may have formed. These can be filled with caulk or another type of sealant, creating a water-tight seal.
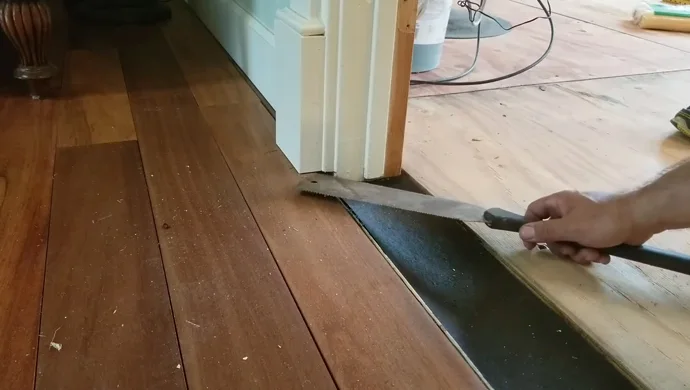
Step Four: Trimming the Plywood
Once the plywood is in place, you will need to trim it to fit the floor. Use a straightedge and a utility knife to score the plywood, then snap it along the line.
For a more precise cut, try using a circular saw or a jigsaw. Try to avoid cutting through any of the supports, as this can weaken the structure.
If you do need to cut through support, make sure to use a plywood-specific blade to prevent damaging the material. To finish up, use a belt sander to smooth down any rough edges. Be sure to wear safety goggles and a dust mask when using power tools.
Step Five: Leveling the Plywood
Now that you’ve got your new plywood floor installed, it’s time to level it so your furniture will sit level and doors will open and close properly. As a starting point, find the highest point in the room and mark it with a pencil.
Then, using a long level, draw a line from that highest point to the opposite wall. Next, measure down from the line at intervals of four feet and make a mark.
Now do the same thing along the other wall. Once you have a series of marks, connect them with a pencil to create a level line. From there, it’s simply a matter of following these steps:
- Set your laser level on the floor at one of the marks and align it, so the beam is perpendicular to the line you drew on the wall.
- Move your level to the next mark and adjust it until the beam hits the first mark on the wall.
- Continue moving your level as necessary in order to align the beam with all of the marks on the wall.
- Once you’re finished, use a straightedge to draw a line along the beam of your laser level. This will be your new reference line for leveling the floor.
- To finish, use self-leveling compounds to fill in any low spots along the floor. This will ensure that your plywood floor is level and smooth.
Step Five: Applying Finish and Protecting the Floor
After installing the floor, the next thing to do is to apply a finish and protect it. There are different ways to do this depending on what type of laminate flooring you have.
For instance, if you have ceramic tile, you may apply a sealer to protect it from water and stains. Another option is wax for protection against scratches.
If you have hardwood floors, you can use a urethane-based finish which will protect them from moisture and damage. It is also possible to use a polyurethane finish which is more durable. You can also use a lacquer-based finish that is highly resistant to scratches.
These are just some of the things to consider when installing a plywood floor. By following these steps, you can be sure that your floor will be installed properly and will last for many years to come.
What Type of Plywood Can Be Used As a Subfloor?

When most people think of plywood, they envision flimsy sheets of particle board used for things like arts and crafts projects. But plywood is actually a versatile material that comes in a variety of different grades and thicknesses.
It is made by bonding together thin layers of wood veneer with an adhesive. The type of plywood that is best suited for subflooring depends on the intended purpose.
Here are some different types of plywood that are appropriate for use as a subfloor:
1. CDX Plywood:
CDX plywood is one of the most popular types of plywood used for construction projects. It is made with a cross-laminated structure that creates a strong, stable sheet of wood floor.
This makes it the perfect wood subfloor material, as it can withstand a lot of weight and traffic without sagging or becoming damaged. CDX plywood is also relatively easy to work with, which is another reason why it is popular among do-it-yourselves.
When installing the subfloor CDX plywood, one should use screws or nails that are long enough to penetrate through it and into the floor joists below. This will help to ensure that the subfloor is securely attached and will not move or shift over time.
2. OSB Plywood:
OSB plywood is a type of engineered wood that is made from pieces of wood that have been glued and pressed together. It is often laid as a base, which is the layer of material that is laid over a foundation before the hardwood flooring is installed.
OSB plywood is ideal for subflooring because it is hard-wearing and durable, and it can be easily installed using nails or screws. The fact is that this plywood is less likely to warp or cup than other types of plywood, making it a good choice for use in areas where there is high moisture or temperature fluctuations.
If you are planning to use OSB plywood as a subfloor, be sure to ask your local building supply store for advice on the best way to install it.
3. MDF Plywood:
MDF stands for medium-density fiberboard. It is an engineered wood product made from wood fibers glued together with resin. MDF is denser and harder than particle board and plywood, making it an ideal material for a variety of applications.
One of those applications is using it as a subfloor on top of concrete. Due to its dense nature, MDF provides a level surface that is resistant to cupping and warping.
On top of that, the smooth surface of MDF makes it ideal for installing floorings such as laminate or hardwood. Unfortunately, one downside of MDF is that it is susceptible to moisture damage.
For this reason, you should seal any seams and edges with a waterproof sealant before installing wood flooring. With proper care and protection, MDF can provide a durable and level surface that lasts a long time.
These are just a few of the plywood types that are suitable for subfloors. You can also talk to a local contractor or home improvement store for more information on the best type of plywood to use for your specific project.
FAQ’s
It’s time to answer some frequently asked questions about plywood subfloors. These are important questions that we get all the time, and we want to make absolutely sure that you have the answers that you need.
What Should I Put Between Wood And Concrete?

When it comes to filling the gap between concrete and wood, there are a few options to choose from. One popular choice is expanding foam. This type of foam is easy to use and can be found at most hardware stores.
Simply apply the foam to the gap using a caulk gun, and it will expand to fill the space. Another option is hydraulic cement. This product is more difficult to apply, but it creates a very strong bond that will help to prevent future cracking and leaking.
Whichever option you choose, carefully follow the manufacturer’s instructions carefully in order to achieve the best results.
How Thick Can I Pour Floor Leveler?
Most self-leveling and floor patch compounds can be applied in layers up to 1/8″ thick, but always check the manufacturer’s recommendations for your particular product. In general, it’s best to apply a thinner layer and let it dry completely before adding extra material.
This will help ensure that the compound sets properly and doesn’t crack or crumble over time. If you need to build up a thicker layer, start with a thin base coat and then add several coats until you reach the desired thickness.
As always, use caution when working with any type of floor leveling or patching compound, and be sure to follow all manufacturer’s instructions carefully.
What is the Best Subfloor Material?
In terms of choosing a subfloor, there are a few different options available. Choosing plywood is an excellent choice, and for a good reason. It is strong and durable yet extremely flexible.
Plywood is relatively inexpensive and easy to find. There are a few downsides to consider. It can be difficult to clean, and it is also susceptible to damage from moisture.
As a result, it is vital to ensure the plywood subfloor is well-sealed before installation. Overall, plywood is a versatile and affordable option for your concrete needs.
Does Plywood Resist Water?
Most people believe that plywood is a waterproof material. After all, it’s often used in construction projects where water resistance is key. In reality, plywood is only water-resistant, not waterproof.
This means that it will withstand some exposure to water, but it will eventually start to break down if it’s constantly exposed to moisture. While paint, polyurethane, or epoxy finishes can make plywood more water-resistant.
It’s important to remember that these finishes need to be reapplied regularly in order to maintain their effectiveness. In other words, if you’re looking for truly waterproof flooring material, plywood is not the best option.
Conclusion
Now you know the answer to the question you don’t need to think twice about, “Can I put plywood over the concrete floor?” You can also decide if plywood subflooring is a smart choice based on the information you read above.
Just be aware that plywood comes in different varieties, each with its own pros and cons. Be sure to do your research before making a final decision.
The goal of this article was to help you. Whenever you work with construction materials, take precautions. Long-term, you’ll save time, money, and headaches. I hope you enjoyed reading this post.